AmFana Pedal through life's journey: Unchain the Adventure!
Yes, it is possible to patch a tubeless mountain bike tire. Tubeless tires can be patched using a tire repair kit specifically designed for tubeless systems to fix punctures and maintain tire integrity.
However, the success of the patch may vary depending on the size and location of the puncture. Proper preparation and application of the patch are crucial for a reliable repair. We will discuss the process of patching a tubeless mountain bike tire and provide some tips to ensure a successful repair.
So, whether you are a beginner or an experienced rider, keep reading to learn how to patch a tubeless mountain bike tire effectively.
Understanding Tubeless Mountain Bike Tires
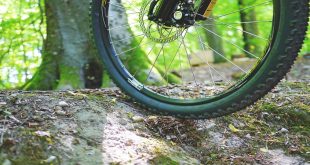
When it comes to mountain biking, having the right tires can make a world of difference in your riding experience. Tubeless mountain bike tires have gained popularity among riders for their superior performance and reliability. In this article, we will delve deeper into the world of tubeless mountain bike tires, exploring what they are, the benefits of using them, and how they work.
What Are Tubeless Mountain Bike Tires?
Tubeless mountain bike tires are a revolutionary alternative to traditional clincher tires. Unlike clinchers, which rely on an inner tube to hold the air pressure, tubeless tires use an airtight rim and sealant, eliminating the need for a tube. This design offers a host of advantages for mountain bikers, especially in terms of puncture resistance and traction.
Benefits Of Using Tubeless Mountain Bike Tires
There are numerous benefits to switching to tubeless mountain bike tires. Here are some key advantages that make them a popular choice among riders:
- Puncture resistance: Tubeless tires reduce the risk of punctures caused by thorns, rocks, and other sharp objects. The sealant inside the tire automatically seals small punctures, allowing you to continue riding without any interruptions.
- Reduced weight: Without the need for an inner tube, tubeless tires are lighter than clinchers. This translates to improved acceleration, maneuverability, and overall performance on the trail.
- Lower tire pressure: Tubeless tires can be run at lower pressures than traditional tires, providing better traction and allowing for a smoother ride on rough terrains.
- Improved grip: The absence of a tube allows tubeless tires to conform better to the terrain, resulting in improved grip and cornering capabilities.
- Self-sealing capabilities: The sealant inside the tire not only guards against punctures but also seals small holes while riding, ensuring a hassle-free experience on the trails.
How Do Tubeless Mountain Bike Tires Work?
Tubeless mountain bike tires operate on a straightforward principle. The key components of a tubeless setup include an airtight rim, a tubeless-specific tire, and sealant. The sealant is added to the tire before it is inflated. As the tire is inflated, the rim and tire form a tight seal, preventing air from escaping.
During riding, if a puncture occurs, the sealant rushes into the hole, quickly sealing it from the inside. This self-sealing mechanism ensures that minor punctures don’t hinder your ride. In the event of a larger hole, the sealant may not be sufficient, and a tube or patch may be required as a temporary fix.
Overall, tubeless mountain bike tires offer enhanced performance, improved puncture resistance, and a more enjoyable riding experience. If you’re looking to take your mountain biking adventures to the next level, switching to tubeless tires is definitely worth considering.
Common Reasons For Tire Punctures
Factors That Contribute To Tire Punctures
Tire punctures are a common occurrence for all mountain bike riders, and tubeless tires are no exception. Whether you’re a seasoned pro or just starting out, it’s important to understand the common reasons why your tubeless mountain bike tire might get punctured. By understanding these reasons, you can take proactive measures to prevent punctures and keep your rides smooth and uninterrupted. In this article, we’ll explore the different types of punctures that can occur with tubeless mountain bike tires, how to identify a puncture, and the various factors that contribute to tire punctures.
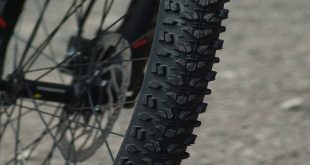
Types Of Punctures That Can Occur With Tubeless Mountain Bike Tires
There are different types of punctures that can occur with tubeless mountain bike tires. These include:
- Thorns and splinters: These are tiny sharp objects commonly found on trails that can penetrate the tire casing.
- Broken glass or sharp rocks: These objects can easily slice through the tire and cause a puncture.
- Pinch flats: Also known as snake bites, these punctures occur when the tire compresses against the rim during a hard impact, causing two small parallel punctures.
- Nail or screw punctures: These types of punctures are often encountered in urban environments where debris from construction sites or road repairs can pose a threat to your tires.
How To Identify A Puncture In A Tubeless Mountain Bike Tire
Identifying a puncture in a tubeless mountain bike tire can be challenging, as there is no visible tube to indicate a flat. However, there are a few telltale signs that can help you identify a puncture:
- If you notice a sudden loss of air pressure or a hissing sound, it is likely that you have a puncture.
- If your tire feels squishy or doesn’t maintain its shape when you push down on it, it may indicate a puncture.
- Inspect the tire for any visible cuts, holes, or objects embedded in the tread.
- Submerge the tire in a water-filled basin or spray soapy water on the tire. Look for bubbles, as they indicate air escaping from the puncture.
Factors That Contribute To Tire Punctures
Several factors can contribute to tire punctures on tubeless mountain bike tires, including:
- Tire pressure: Insufficient tire pressure makes the tire more susceptible to punctures.
- Tire tread: Worn-out or insufficient tread can decrease traction and increase the risk of punctures.
- Terrain: Riding on rough or rocky terrains increases the likelihood of encountering sharp objects that can cause punctures.
- Tire sealant: Old or ineffective sealant can fail to seal small punctures, leading to continued air loss.
Understanding the various types of punctures, how to identify them, and the factors that contribute to tire punctures is essential for any tubeless mountain bike rider. By being proactive in preventing punctures and taking steps to address them promptly, you can enjoy your rides with greater peace of mind and minimize any disruptions or delays.
Patching A Tubeless Mountain Bike Tire
Can You Patch A Tubeless Mountain Bike Tire?
One of the most common concerns among tubeless mountain bike riders is whether it is possible to patch a punctured tire. The answer is yes, you can patch a tubeless mountain bike tire! Unlike traditional tubed tires, tubeless tires are designed with a sealant that can effectively seal small punctures, allowing you to continue riding without the hassle of replacing the entire tire. Patching a tubeless mountain bike tire can save you time and money, making it a valuable skill for any rider to learn.
Steps To Patch A Small Puncture In A Tubeless Mountain Bike Tire
If you encounter a small puncture in your tubeless mountain bike tire, patching it is a relatively straightforward process. Here are the steps you need to follow:
- First, remove any debris from the punctured area, such as thorns or glass shards. It’s important to clean the area thoroughly to ensure a proper seal.
- Deflate the tire completely by removing the valve core. This step is necessary to access the inside of the tire.
- Apply a small amount of soapy water to the punctured area and carefully inspect for any leaks. The water will create bubbles where air is escaping, helping you identify the exact location of the puncture.
- Once you have identified the punctured area, you can use a patch kit specifically designed for tubeless tires. These kits typically include a vulcanizing patch and adhesive.
- Prepare the patch by roughening the surface with sandpaper and applying the adhesive. Make sure to follow the instructions provided with the patch kit for best results.
- Apply the patch to the punctured area, pressing down firmly to ensure a secure bond. It’s important to let the adhesive set for the recommended amount of time before reinflating the tire.
- After the patch has fully cured, reinflate the tire and check for any remaining leaks. If there are no further leaks, you’re good to go! However, if you still notice air escaping, repeat the patching process or consider replacing the tire.
Different Patching Techniques For Various Types Of Punctures
Patching techniques can vary depending on the type and size of the puncture in your tubeless mountain bike tire. Here are some common types of punctures and the recommended patching techniques:
| Puncture Type | Patching Technique |
|---|---|
| Small, single hole | Use a vulcanizing patch kit to seal the hole. |
| Larger hole or cut | Consider using a tire plug or vulcanizing patch combined with a tire boot for added reinforcement. |
| Tear in sidewall | Use a sidewall patch specifically designed for tubeless tires. This type of patch provides extra strength and durability. |
By understanding the different patching techniques for various types of punctures, you can effectively repair your tubeless mountain bike tire and get back on the trail in no time.
Considerations And Limitations
When it comes to maintaining your tubeless mountain bike tires, you may encounter situations where patching is necessary. However, it’s crucial to understand the considerations and limitations associated with this process. Before attempting to patch your tubeless mountain bike tire, there are several factors you should take into account. Additionally, there are limitations to be aware of, as patching may not always be the appropriate solution. This section will cover the factors to consider before patching and the limitations you need to keep in mind.
Factors To Consider Before Patching A Tubeless Mountain Bike Tire
Before you start patching your tubeless mountain bike tire, it’s important to carefully assess the situation. Consider the following factors:
- Damage size: Evaluate the size of the puncture or tear. While smaller punctures can often be effectively patched, larger or more severe damage may require a replacement.
- Location: Take note of where the damage is located on the tire tread. Patches tend to be less effective on sidewalls compared to the center of the tire.
- Tire condition: Examine the overall condition of your tire. If it is already worn or showing signs of significant wear and tear, patching may not be a long-lasting solution.
- Tubeless sealant: Evaluate the integrity of the tubeless sealant inside your tire. If it has dried up or is insufficient in volume, simply patching the tire may not be enough to prevent further air leaks.
By considering these factors, you can make a more informed decision about patching your tubeless mountain bike tire.
Limitations Of Patching Tubeless Mountain Bike Tires
While patching can often be a viable solution for minor damage, it’s crucial to acknowledge the limitations of this approach. Here are the key limitations to keep in mind:
- Temporary fix: Patching a tubeless mountain bike tire is typically considered a temporary fix. It can extend the life of the tire, but it may not provide a permanent solution.
- Effectiveness: The effectiveness of a patch largely depends on the size and location of the damage, as well as the condition of the tire and sealant. It may not be as effective on larger punctures or tears.
- Risk of failure: There is always a risk that a patched tire could fail while riding, especially if the damage worsens or the patch does not hold up under pressure.
Understanding these limitations is essential to ensure your safety and the longevity of your tubeless mountain bike tire.
When It’s Appropriate To Patch A Tubeless Mountain Bike Tire Vs. Replacing It
Deciding whether to patch or replace a tubeless mountain bike tire ultimately depends on the severity of the damage. Here are some situations where patching may be appropriate:
- Small punctures: If you have a small puncture, such as from a thorn or tiny nail, patching can often provide a sufficient and cost-effective fix.
- Minor tears: In the case of minor tears or cuts on the tire tread, patching can be a viable option, especially if the tire is relatively new and in good overall condition.
- Temporary solution: If you need a quick and temporary solution to get back on the trails, patching can buy you some time before a replacement is necessary.
However, it’s important to remember that there are instances where replacing the tire is the better choice:
- Severe damage: If the tire has sustained severe damage, such as large punctures, substantial tears, or sidewall damage, it is generally recommended to replace the tire entirely.
- Worn-out tires: If your tire is already worn-out or approaching the end of its lifespan, patching may only provide a temporary fix. It’s better to invest in a new tire for long-term performance and safety.
Knowing when to patch and when to replace a tubeless mountain bike tire is crucial for maintaining optimal performance and safety.
Maintaining And Preventing Tire Punctures
Tire punctures can be a frustrating and inconvenient experience for any mountain biker. However, with proper maintenance and some preventative strategies, you can significantly reduce the chances of encountering a flat tire during your rides. In this blog post, we will explore some helpful tips for maintaining tubeless mountain bike tires to prevent punctures, discuss effective strategies to avoid punctures while riding, and highlight the essential tools and equipment you need for on-the-go tire repairs.
Tips For Maintaining Tubeless Mountain Bike Tires To Prevent Punctures
Maintaining your tubeless mountain bike tires is crucial for preventing punctures on the trails. By following these tips, you can enhance the durability and longevity of your tires:
- Regularly check tire pressure using a reliable gauge. The recommended pressure can vary depending on factors such as rider weight and terrain. Maintaining the right tire pressure helps prevent pinch flats and excessive rolling resistance.
- Inspect your tires for any visible signs of damage, such as cuts, tears, or excessive wear. If you notice any issues, address them promptly to avoid potential punctures on your ride.
- Ensure proper sealant levels in your tires. Tubeless tires rely on sealant to plug small punctures automatically. Check the sealant levels regularly, and top it up if necessary.
- Consider using thicker tire casings or inserts that offer enhanced puncture protection. These extra layers can help reduce the risk of punctures caused by sharp rocks or thorns on the trail.
- Rotate your tires periodically to distribute wear evenly. This practice can prevent excessive wear on one specific area of the tire and reduce the chances of developing weak spots or sidewall cuts.
Strategies For Preventing Punctures During Rides
Riding smart and adopting certain strategies can greatly minimize the risk of getting a flat tire on the trails. Here are some effective tactics to prevent punctures:
- Avoid riding through debris and sharp objects on the trail whenever possible. It’s best to stay on the cleanest line and anticipate potential hazards to reduce the chances of tire damage.
- Choose your lines carefully, especially when navigating rocky sections. Opt for smoother lines that minimize direct contact with jagged edges or protruding rocks.
- Adjust your riding technique to maintain momentum and reduce impacts. By avoiding sudden braking and harsh landings, you can reduce the stress on your tires and decrease the likelihood of punctures.
- Consider using tire inserts or anti-puncture strips that provide an additional layer of protection against punctures. These add-ons can absorb impacts and prevent sharp objects from penetrating your tire.
- Be mindful of your tire pressure. Lower pressures can offer improved traction but also make your tires more vulnerable to pinch flats. Find the right balance that suits your riding style and the specific terrain conditions.
Essential Tools And Equipment For On-the-go Tire Repair
Despite taking all necessary precautions, punctures may still occur on the trail. That’s why it’s important to carry a few essential tools and equipment to perform on-the-go tire repairs, enabling you to get back on your bike quickly. Here are some items to include in your tire repair kit:
| Item | Description |
|---|---|
| Tire levers | These small but sturdy tools help remove the tire from the rim, making it easier to access and fix the puncture. |
| Patch kit | Containing rubber patches, sandpaper, and adhesive, a patch kit allows you to repair small punctures on the trail. |
| Spare tube | Carrying a spare tube can be a lifesaver if you encounter a large puncture or damage that cannot be patched immediately. |
| C02 inflator or mini pump | These tools help you quickly reinflate your tires after fixing a puncture. |
| Multi-tool | A compact multi-tool with various Allen keys and other wrenches is invaluable for making quick adjustments on the trail. |
| Spare valve core | Having a spare valve core can come in handy if the existing one becomes damaged during the repair process. |
Carrying these essential tools ensures that you are prepared for any unforeseen punctures during your ride. Being self-sufficient with quick tire repairs allows you to maintain your momentum and enjoy your mountain biking adventures to the fullest.
Frequently Asked Questions For Can You Patch A Tubeless Mountain Bike Tire?
Can You Patch A Tubeless Mountain Bike Tire?
Yes, you can patch a tubeless mountain bike tire. Tubeless tires are designed to be repaired just like standard tube tires. To patch a tubeless tire, you will need to locate the puncture, clean the area, apply a patch, and re-inflate the tire.
Make sure to use a tubeless-specific patch kit for the best results.
Conclusion
To sum up, patching a tubeless mountain bike tire is indeed possible and can save you from the hassle of replacing the entire tire. With the right tools and technique, you can easily fix punctures and continue enjoying your ride.
Remember to carefully inspect the tire for any damages and ensure a proper seal before hitting the trails. So why wait? Be prepared and confidently tackle any unexpected flats on your adventures.